Working With Files
Should You Upload a Document?
Before uploading a PDF or other file, take a moment to consider whether the information truly needs to be a standalone document. In many cases, content is more accessible, easier to update, and more useful to your audience when placed directly on a webpage rather than locked inside a file.
If you're unsure whether uploading a PDF is the right choice, review this PDF Decision Tree for guidance: https://theaccessibilityguy.com/pdf-decision-tree-for-title-ii-ada-update-april-2026/
This resource can help you determine when a document is appropriate—and when the content would better serve students, faculty, and staff as part of a new or existing page.
Checking for Document Accessibility Issues
Before uploading any document to the campus website, it must meet full accessibility requirements. To help you verify this, we've prepared two guides that explain how to check for accessibility issues in both Adobe Acrobat Pro and Microsoft 365 (Word, Excel, and PowerPoint). Review the KB articles below before sending a document through the workflow.
Uploading Files
All sites will have a “files” folder with two subfolders named “documents” and “images”. Within these subfolders, you may see additional subfolders set up to further help with organizing files.
If you need to create a new subfolder to organize documents and images, please follow these steps:
- Click on “Add Content” in the top ribbon menu. A fly-in menu will populate.

- Click on the “SCSU Sub Sites” folder in the fly-in menu.

- Select the “Folder” option.

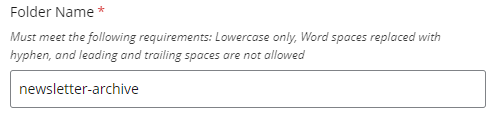
- Give the folder a name while following our standard naming convention.
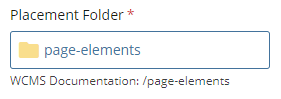
- Click the button under the “Placement Folder” section and browse to the location where you want the folder to be created. It must go under “documents” or “images”.
- Once done, click on the “Choose” button in the upper-right corner of the screen.

- In the “Display Name” field, give the folder a user-friendly name, such as “Newsletter Archive”.

- Click on the “Submit” button in the upper-right corner of the screen.

- The spell-check will run. If there are no spelling errors, click on the checkmark icon in the upper-right corner of the screen.

If you are ready to upload a document or image, please follow these steps:
- First, please ensure the file that you will be uploading is following our standard naming convention.
- Additionally, if you are uploading a PDF document, please ensure that the text within the PDF is selectable and searchable (there should be no "flattened" text anywhere on the PDF).
- Additionally, if you are uploading a PDF document, please ensure that the text within the PDF is selectable and searchable (there should be no "flattened" text anywhere on the PDF).
- Click on “Add Content” in the top ribbon menu. A fly-in menu will populate.
- Click on the “SCSU Sub Sites” folder in the fly-in menu.
- Select either “Document” (for PDF files) or “Image” (for JPG and PNG files).


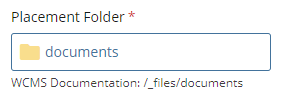
- Click the button under the “Placement Folder” section and browse to the location where you want to upload the file. It must go under “documents” or “images” or in a subfolder under “documents” or “images”.
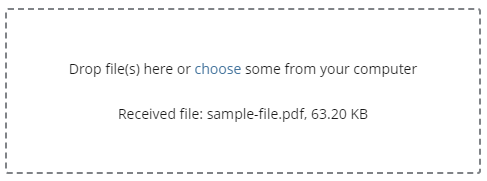
- Next, you can either drag and drop the file from where it has been saved on your computer (usually the desktop or a network folder) into the “drop file(s) here” box. Or, you can click on the “choose” hyperlink in the same box and browse to where the file is saved.
- After you do this, the file name will automatically be populated in the “File Name” box. You may change this if you wish, but you will still need to follow our standard naming convention.
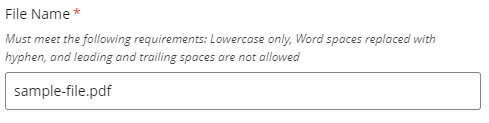
- Next, click on the “Preview Draft” button to save the document as a draft.

- Click the “Submit” button.
- Click the “Check Content & Submit” button. This will check for spelling errors in the file name only. If you are uploading documents and spot a spelling error in the document, you will need to click on the “Edit” button and replace the document with a new one.

- If there are no spelling errors, click on the checkmark icon to submit the draft.
- Follow the steps outlined in the workflow process. Files will not show up in the site hierarchy until they have been approved via the workflow. If you know that you will be editing a page that has updated or new file references, you should be uploading the files first before editing the page.
- Once they are approved, you may proceed with linking the document or applying the image in a page.
Updating Files
If you are needing to update existing files, please follow these instructions. The process is the same for both documents and images.
- Your site should contain a "files" folder with two subfolders named "documents" and "images". These folders may contain additional subfolders for further organization of files.
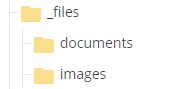
- Please locate the name of the existing file that you are needing to update by expanding the applicable folder.
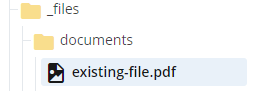
- If you know the file name, you can enter it in the searchbox (located in the top right corner of the page) but you will first need to click into the applicable subfolder. After you do that, you can start typing the file name of the file that needs to be updated.

- Once you have located the file, simply click on the file name.
- To begin the process to edit, please click on the "Edit" icon in the top toolbar.

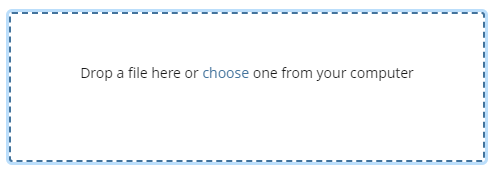
- A pop-up will appear with an area that reads "drop a file here or choose one from your computer". You can either drag and drop the file from where it has been saved on your computer (usually the desktop or a network folder) into this area. Or, you can click on the "choose" hyperlink in the same box and browse to where the file is saved.
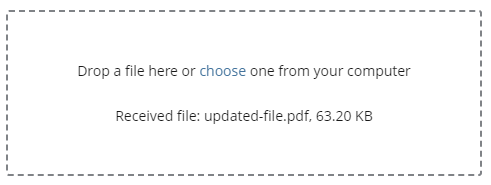
- Once the file has been uploaded, a message will appear reading, "Received file: filename". It is important to note that the filename of the file that you have uploaded will not rename the file that you are editing. If you need to rename the file, please email the Web Team.
- Click on the "Preview Draft" button to save the document as a draft.
- Click the "Submit" button.
- Follow the steps outlined in the workflow process.
- Once the workflow has finished, the updated file will be published live on the site. If you do not see the updated file, please refresh the page.
Reviewing & Removing Files
Regularly reviewing your files helps keep the site clean, accurate, and free of outdated documents. Learn more about reviewing and removing files.